Showing posts with label Blogging Marathon. Show all posts

Jan 29, 2012

Crispy Fried Moong Dal Snack - Haldiram Style!

I was always a big fan of the Haldiram's Moong Dal Namkeen. A bag of those crispy fried moong dal to munch on and a book to read was all I wanted to relax on weekends! I wanted to replicate the snack at home and I almost dished out crispy moong dal that almost tasted like those of Haldiram's but mine looked a little more golden brown in color.


Ingredients
Split Yellow Moong Dal - 1 cup
Salt to taste
Oil for deep frying

Instructions

  1. Soak the moong dal overnight or atleast for 4 to 5 hours.
  2. Drain the water and pat the dal dry with a paper towel or a dry kitchen towel.
  3. In a heavy bottomed vessel, heat oil until it is piping hot.
  4. Once the oil reaches its smoking point, drop in a moong dal to see if it sizzles immediately. If it sizzles immediately, then the oil is ready for deep frying.
  5. Take care the oil is ready. If the oil is not at the right temperature, the dal absorbs a lot of oil. So take care the oil is at the right temperature.
  6. Deep fry the moong dal in batches and remove them once they turn crispy and golden brown. It took around 20 to 30 seconds to get them done. 
  7. Drain the dal in paper towels. Sprinkle salt to taste and mix well.
  8. Store in airtight containers.

Note: To make things easier, I used a strain to deep fry the moong dal. I took a batch of the dal and once the oil gets hot, just dip the strain into the oil. Once the dal gets fried just lift the strain from the oil and drain the moong dal in paper towels.

This is my entry for day 7 in the 7 day blogging marathon! Check out the Blogging marathon page for the other Blogging Marathoners doing BM#12.

Jan 28, 2012

Whole green gram dal fry

This is another simple and wholesome dal recipe and another variation from the regular dal. The whole moong dal packs more nutrients. A wholesome protein source and this accompanies well with rice or rotis.


Ingredients
To pressure cook
Whole green gram/green moong dal - 1 cup
Tomato - 1 finely chopped
Green chillies - 2
Turmeric powder - 1/2 teaspoon

Onion - 1/2 finely chopped
Ginger garlic paste - 1 teaspoon
Red chilli powder - 1 teaspoon
Garam masala - 1 teaspoon
Oil - 1 spoon
Mustard seeds - 1 teaspoon
Urad dal - 1 teaspoon
Curry leaves 1 sprig
Coriander leaves/cilantro - for garnish
Salt to taste

Instructions

  1. Soak the whole green moong dal for about 1 to 2 hours.
  2. Pressure cook the dal, green chillies, turmeric powder and tomatoes with enough water for about 4 to 5 whistles.
  3. Meanwhile, in a saucepan, heat the oil and do the tempering with the mustard seeds, urad dal and curry leaves.
  4. Once everything starts spluttering, add the chopped onions. Saute till the onions turn translucent.
  5. Then add the ginger garlic paste and saute till the raw smell goes away.
  6. Add the red chilli powder and garama masala and mix well.
  7. Finally add the cooked moong dal and enough water (approximately 1 cup) and bring it to a boil.
  8. Simmer until the required consistency is obtained.
  9. Garnish with coriander leaves and serve.


Note: The green moong dal thickens once the dal cools down. If planning to serve after a while, stir in some hot water or add some water and heat before serving.

This is my entry for day 6 in the 7 day blogging marathon! Check out the Blogging marathon page for the other Blogging Marathoners doing BM#12.

Jan 27, 2012

Paruppu Thuvaiyal / Lentil Chutney or Dip

This is a spicy south indian chutney made with toor dal. It is so so easy to make in a matter of minutes and pairs very well with rice and a dollop of ghee or a drizzle of sesame oil. You can make it with minimal ingredients and as spicy as you like. Just enjoy!

Have you checked out the raffle for the fund drive I am supporting?


Ingredients
Toor dal - 1/2 cup
Red chillies - 3
Garlic pods - 3
Grated coconut - 2 tablespoons
Oil - 1/2 teaspoon
Salt to taste

Instructions

  1. In a saucepan, heat the oil and add the toor dal and red chillies.
  2. Roast for about 2 to 3 minutes until the dal turns fragrant and golden brown.
  3. Grind together the roasted dal, red chillies, garlic, coconut and salt into a coarse paste sprinkling a teaspoon of water while grinding.
  4. Serve over rice and a dollop of ghee or a drizzle of sesame oil.

This is my entry for day 5 in the 7 day blogging marathon! Check out the Blogging marathon page for the other Blogging Marathoners doing BM#12.

This is my entry to My Legume Love Affair #43 started by Susan and hosted this time at Chez Cayenne and Love for Lentils hosted by Sudha

Jan 26, 2012

Moong dal khichdi and giveaway winner!

Here is yet another comfort food that can be made in a matter of minutes in a pressure cooker. Such one pot meals are always great when cooking for one. The husband has lunch at office and I need to find some inspiration to cook lunch for me. I tend to stay with one pot meals or easy fix lunches like sandwiches and soups. This is one such lunch I made for myself.


I have used the split green moong dal for this recipe. This can be substituted with the yellow split moong dal or the whole green moong dal as well. if using whole green moong dal, make sure to soak it for an hour in advance before cooking it with the rice.

Ingredients
Rice - 1 cup ( I used sona masoori rice)
Split green moong dal - 1/2 cup
Tomato - 1/2 roughly chopped
Salt to taste

For the tempering
Oil/ghee - 1 spoon
Jeera/Cumin seeds - 1 teaspoon
Garlic - 1 clove finely chopped
Ginger - 1/2 inch - finely chopped
Green chilly - 1
Curry leaves - 1 sprig


Instructions

  1. Wash the rice and dal with water and drain the water.
  2. In a pressure cooker combine the rice, dal, tomato and salt and add about 3 to 3.5 cups of water. Pressure cook until you get 5 to 6 whistles.
  3. Once the pressure gets released, mash the rice and dal well with a potato masher or a wooden ladle. It should be very mushy.
  4. In a saucepan, do the tempering with the ghee, jeera, garlic, ginger, green chillies and curry leaves and pour it over the cooked rice and dal.
  5. Mix and serve it with pickle and papads.

Ultimate comfort food ready in minutes!

This is my entry for day 4 in the 7 day blogging marathon! Check out the Blogging marathon page for the other Blogging Marathoners doing BM#12.

The winner of the blog anniversary giveaway is Mythreyi of Yum! Yum! Yum! Thanks to everyone of you who participated in the giveaway and left your lovely comments :)

Jan 25, 2012

Low fat Ulundha Vadai / Urad dal fritters

If you are looking for an authentic ulundha vadai / urad dal fritters, this is not the place! I was craving for some ulundha vadai and I did not want to give up my healthy eating by deep frying something. So I made these vadais using my kuzhi paniyaram making pan. They tasted equally delicious and this can be made in a matter of minutes if you have the batter ready. Makes a great accompaniment with your evening chai.


I followed the same ingredient list I use to make the regular ulundha vadais, except for the deep frying method and the hole in the center. I served the vadais with red bell pepper chutney instead of the coconut chutney.

Ingredients
Urad dal - 1 cup
Green chilly - 1 (grated or thinly sliced)
Coriander leaves - 1 sprig
Grated ginger - 1/2 teaspoon
Chopped onion - 2 tablespoons
Salt to taste

Instructions
Soak the urad dal in water for about 3 hours.
Drain the water and in a mixer/grinder, grind the urad dal into a very fine paste. Add very little water (1 to 2 tablespoons) if required while grinding.
When the batter is ready, mix in the other ingredients - green chillies, ginger, chopped onions and salt.
Heat the kuzhi paniyaram pan, and drizzle 1/4 to 1/2 a teaspoon of oil in each hole. Fill with a spoonful of batter in each hole.
After a minute, using a spoon flip the vadais over to cook on the other side.
When the vadais start turning brown, remove them from the pan and serve with chutney of your choice.


This is my entry for day 3 in the 7 day blogging marathon! Check out the Blogging marathon page for the other Blogging Marathoners doing BM#12.

This is my entry to My Legume Love Affair #43 started by Susan and hosted this time at Chez Cayenne and Love for Lentils hosted by Sudha

Jan 24, 2012

Yellow Moong Dal Tadka

This is a basic dal recipe. It is so simple yet so comforting. It can be made in a matter of minutes and is so versatile. You can pair it with rotis and subji or ladle of rice drizzled with ghee! Tastes best anyways. I paired this simple dal with ladies finger poriyal and raw plaintain fry and this was our weekend lunch.


Ingredients
Yellow split moong dal - 1 cup
Water 3 cups
Turmeric powder - 1/2 teaspoon
Green chilli - 2
Tomato - 1
Salt to taste

For the tadka/tempering
Oil/ghee - 1 spoon
Mustard seeds - 1/2 teaspoon
Urad dal - 1/2 teaspoon
Curry leaves - 1 spring
Red chilli - 1
Onion - 2 tablespoons finely chopped (optional)
Hing/Asafoetida - 1 pinch


Instructions
In a pressure cooker, cook the moong dal along with the turmeric powder, green chilli, tomato and 3 cups of water for about 4 whistles. Alternately, you could cook the moong dal in a stockpot or a heavy bootomed pan, covered for about 20 to 30 minutes, until the dal turns soft. The dal could also be cooked in the microwave.
Once the dal gets cooked, add the salt and mash the dal well.
In a saucepan, do the tempering with ghee, mustard seeds, urad, dal, hing, curry leaves, onions and red chillies.
Pour the seasoning over the cooked dal and serve with rice and your favorite vegetable curry.


This is my entry for day 2 in the 7 day blogging marathon! Check out the Blogging marathon page for the other Blogging Marathoners doing BM#12.

This is my entry to My Legume Love Affair #43 started by Susan and hosted this time at Chez Cayenne and Love for Lentils hosted by Sudha

Tomorrow is the last day to submit your entries for the giveaway being hosted at Dil Se.. Do check it out :)

Jan 23, 2012

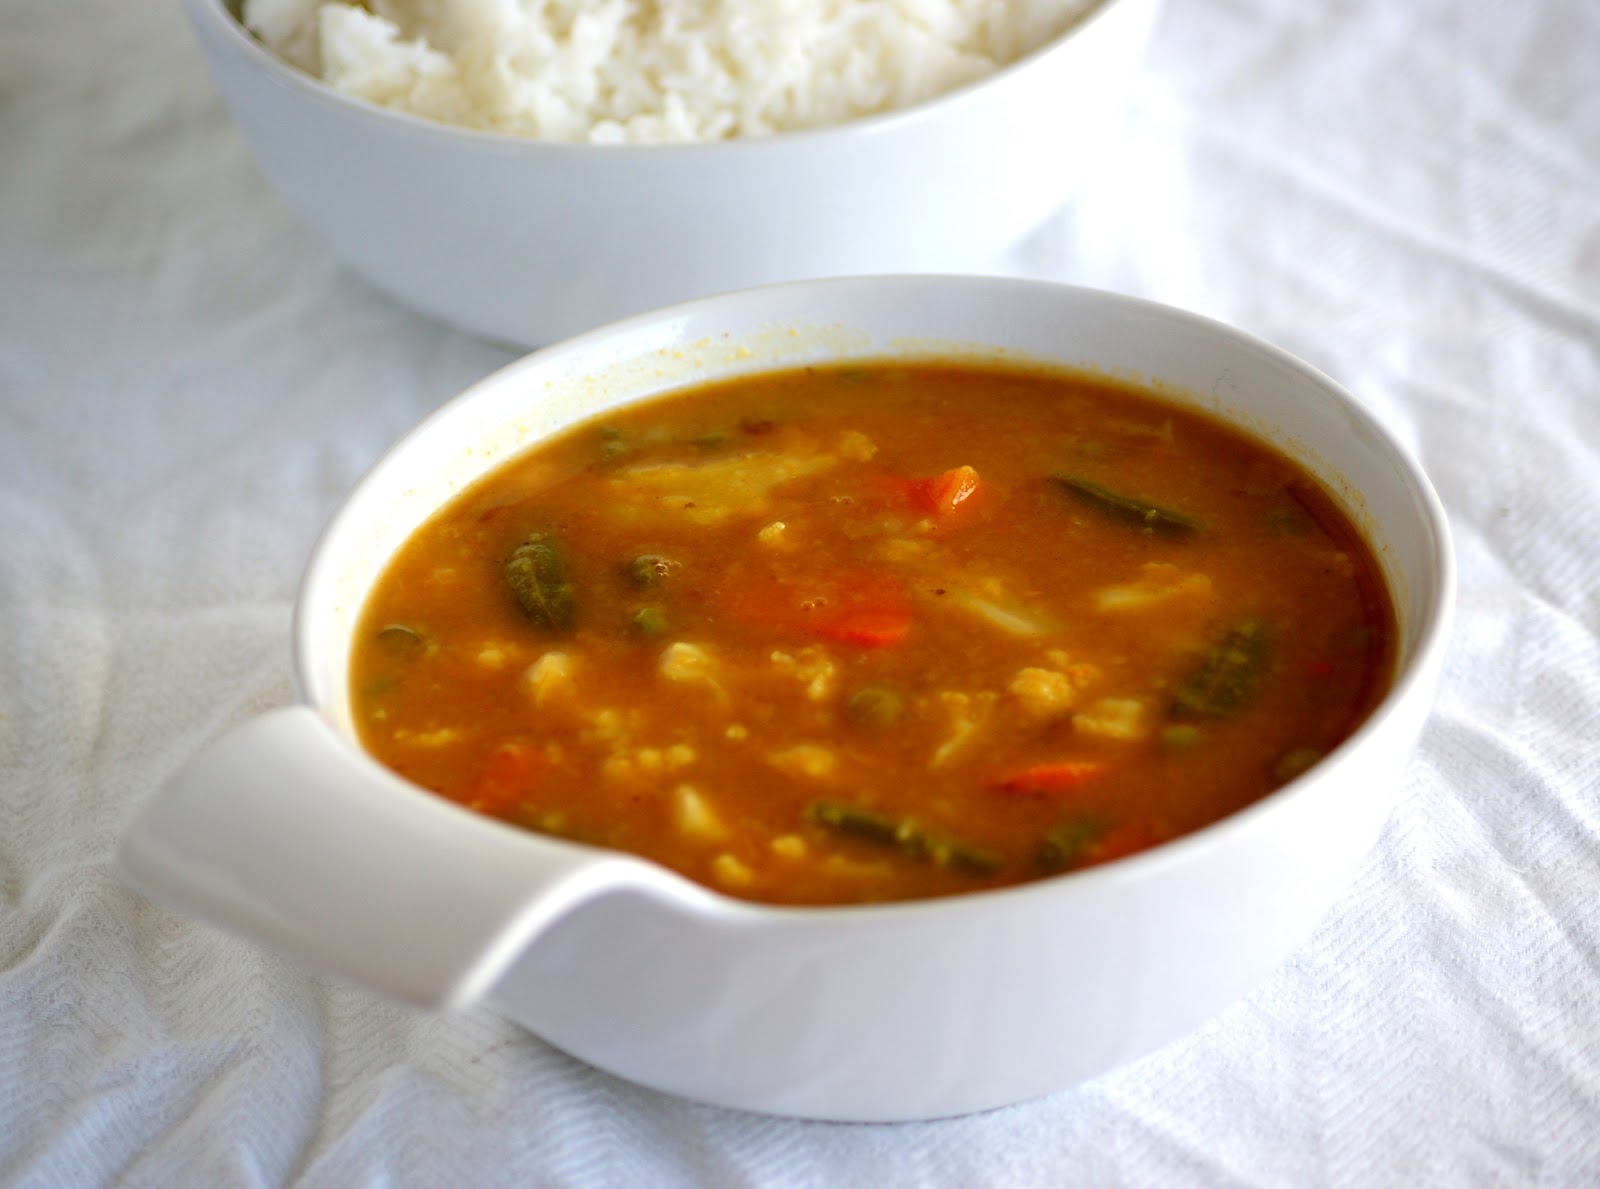
Sambar

While I was compiling a recent post to mark 4 years of blogging, I was astonished to see that I had never blogged about sambar! Sambar is a staple at my house. I make it almost every week or every other week to accompany our dosas and idlies for breakfast and dinner and also with rice and poriyals for lunch. It is a versatile dish to be served for breakfast, lunch and dinner. I try to make different versions by rotating the vegetables I use. This is my mom's recipe for sambar. It sounds like a difficult procedure, but it is so easy to make.


Ingredients
Toor dal - 1 cup
Vegetables - 1 cup chopped (potatoes, drumstick, cauliflower, brinjal, radish, beans, peas, carrots etc. can be used) I use 3 to 4 of the above veggies mentioned
Tamarind extract - from the size of 1 lemon or 1 teaspoon tamarind paste
Sambar powder - 2 teaspoons
All-purpose curry powder/Kuzhambu milagai thool (or chilli powder) - 1 teaspoon
Turmeric powder - 1 teaspoon
Onion - 1/4 cup chopped
Tomato - 2 chopped roughly
Green chillies - 2
Cilantro/coriander leaves - for garnish
Salt to taste

For the tempering
Oil - 2 spoons
Mustard seeds - 1 teaspoon
Urad dhal - 1 teaspoon
Curry leaves - 1 sprig
Hing/Asafoetida - 1 pinch


Instructions

  1. In a pressure cooker, cook the toor dal with about 3 cups of water and turmeric powder until you get 4 whistles. Alternatively, you can cook it in a stockpot for about 30 minutes, until the dal turns soft.
  2. With the help of a wooden spoon or a potato masher, mash the dal to make it into a smooth paste.
  3. In a saucepan/kadai, heat the oil and do the tempering with mustard seeds, urad dhal, curry leaves and hing.
  4. Once everything splutters, add the chopped onions and saute until it turns translucent. Then add the chopped tomatoes and allow it to cook for a minute.
  5. Now add the chopped vegetables and saute until the raw smell goes away.
  6. To this add the sambar powder, curry/chilli powder, salt and the tamarind extract and bring it to a boil.
  7. Simmer for about 5 to 6 minutes until the veggies cook well.
  8. Now add the dal to this and mix thoroughly.
  9. Add some chopped coriander/cilantro, cover and cook for about 10 minutes until you get the required consistency.

Alternate quicker method
After step 6, pour all the contents in the kadai into the pressure cooker with the dal. Add about 1 cup of water and pressure cook for 3 whistles. Delicious sambar is ready.

I am participating in a blogging marathon hosted by Srivalli for 7 days and I will be posting under the theme - "Seven Days of Delicious Dals"

Check out the Blogging marathon page for the other Blogging Marathoners doing BM#12

This is my entry to My Legume Love Affair #43 started by Susan and hosted this time at Chez Cayenne and Love for Lentils hosted by Sudha

Jun 29, 2011

Cucumber Sandwich with basil-mint-cilantro chutney

Picnic food would be incomplete without sandwiches. And cold sandwiches to cool you down would be the best. This sandwich is made with cucumbers and smeared with some cream cheese and basil-coriander-mint chutney. It is very simple to make and can be made ahead and left to chill in the refrigerator till you enjoy them. Make these sandwiches along with other delicious and simple to make picnic food like desi omelet, kale chips, 10 minute banana bread, marble cake, falafel-pita sandwich and wash them all down with this gorgeous blueberry lemonade.

For the blogging marathon, I was paired with Harini and I had to make something from her blog based on the picnic theme. I chose this basil-mint-cilantro chutney and made simple cucumber sandwiches with the chutney. The chutney paired the cucumbers really well and made a great evening snack. This can also be packed as lunches for kids. I made the chutney with my homegrown basil and cilantro harvested fresh from my garden!

Ingredients for the Chutney
Recipe Source: Tamalapaku

Basil - 1 cup
Mint - 1/2 cup
Cilantro/Coriander leaves - 1/2 cup
Tamarind paste - 1 teaspoon
Green chillies - 2
Oil - 1 teaspoon
For the seasoning - Mustard seeds(1 tspn), urad dal(1 tspn), channa dal(1 tspn), red chillies(1), hing(1 pinch)
Salt to taste

Directions
In a small pan heat the oil and do the seasoning with the mustard seeds, urad dal, channa dal, red chillies and hing. Once the dal turns brown in color, add the basil, cilantro and mint. Saute for a minute until the leaves wilt.

Allow it to cool and blend it together with the tamarind paste, green chillies and salt without adding any water.

To assemble the sandwiches
Cut the edges of the bread and slice them into triangles. Smear some cream cheese/butter on both sides, followed by 1/2 a teaspoon of the prepared chutney on each slice. Place 3 or 4 sliced cucumber rounds and place another slice of bread on top to make a sandwich.
Sending these sandwiches to Sandwich Mela and to the Giveaway by Ruchika Cooks

Jun 28, 2011

Blueberry Lemonade

Picnics during the summer would be incomplete without some summery juices and lemonades. This is a no brainer recipe for lemonade with a few blueberries floating which provide just the right amount of tanginess and color to your ordinary lemonade. Also, your lemonade will have an antioxidant punch from the blueberries! This can be served during parties and during picnics and can be made in no time. They can also be made ahead and stored in a pitcher in a refrigerator. The blue color increases with time.

I found this idea to make blueberry lemonade when i was browsing for recipes to use up my berries. i made these using frozen berries. They taste great when made using fresh berries. The lemonade can also be made using different berries like raspberries, strawberries, cranberries etc.

Ingredients (serves 2)
Lemon juice, freshly squeezed - 3 tablespoons
Sugar - 3 tablespoons
Ice cold water - 2 glasses
Blueberries, fresh or frozen - 3 tablespoons or more

Directions

  • In a bowl, stir together the lemon juice, sugar and water until the sugar dissolves completely. 
  • Add in the blueberries and with the back of a spoon, just press a few blueberries, so that the blue color dissolves into the water. 
  • Adjust sweetness and pour into a glass with ice cubes and enjoy!


Check out the Blogging Marathon page for the other Blogging Marathoners doing BM#6

Jun 27, 2011

Marble Cake

This is one pretty cake which does not require any frosting and it looks beautiful and tastes great by itself. It is very similar to the zebra cake except that the cake has a marbled effect and not the perfect black and white lines. It is fun to have a random mix of chocolate and plain vanilla cake in each bite.

Ingredients
Recipe Source: Joy of Baking
Maida/All purpose Flour - 2 1/4 cups
Unsalted butter - 1/2 cup at room temperature
Granulated sugar - 1 1/4 cups
Eggs - 2
Semisweet Chocolate, chopped roughly - 2 oz or about 55 gms
Brewed coffee - 1 tablespon
Vanilla Extract - 2 teaspoons
Sour cream/Yogurt - 3/4 cup
Milk - 1/3 cup
Cinnamon powder - 1/2 teaspoon
Baking powder - 1 tablespoon
Baking soda - 1/2 teaspoon
Salt - 1/4 teaspoon

Directions
Preheat oven to 350F.

Melt the semisweet chocolate and brewed coffee in a double boiler (Bring water to a simmering boil in a saucepan. Place a the semisweet chocolate and brewed coffee in a stainless steel bowl and place the bowl in the saucepan with water). Once the chocolate melts, remove from the heat and set aside. Alternatively, you could microwave the chocolate and coffee together for about 30 seconds.

In a bowl, sift together the flour, salt, baking soda, baking powder and cinnamon.

In another bowl, cream together the butter and sugar using a hand mixer/electric mixer until soft and fluffy or about 2 to 3 minutes. Add eggs, one by one and continue beating. Slowly add in the vanilla extract and sour cream and beat until well incorporated.

Slowly add in the flour mixture and milk by alternating them and continue beating, until you have added all the flour and milk.

Once the batter is ready, pour half of the batter into another bowl and add the melted chocolate into one half and mix thoroughly.

Grease a bundt/loaf pan and pour the batter into the pan alternating with a spoon of chocolate and vanilla batter. Using a spatula or a spoon, draw some swirls in the batter to give a swirling effect.

Bake in the preheated oven for 50 to 60 minutes until a toothpick inserted comes out clean. Cool on a wire rack for about 10 minutes and slice the cake.

Serve warm or at room temperature.

This cake makes a great snack at picnics and this is my post for the Blogging Marathon with the theme Picnic Food. Check out the Blogging Marathon page for the other Blogging Marathoners doing BM#6

Jun 26, 2011

Kale Chips!

Are you someone who hates kale? Then you should definitely try these crispy, crunchy, delicious kale chips! I have been seeing these kale chips a lot around the blogosphere and I had to try it. Kale is a chock full of Vitamin A, C, calcium and iron. I grabbed a bunch of kale from my farmers market to make this chips and some salad. But I have been staying away from kale salads, fearing it might have some strong taste. But when I made these chips, I knew I am going to make these very often! They are so addictive like potato chips!

The recipe is so simple. I kept it simple by adding olive oil, salt and apple cider vinegar. The vinegar gave some tanginess to the chips. The chips also taste great with just olive oil and salt. You could also make several other variations - pepper, rice vinegar, balsamic vinegar, canola/vegetable oil, nutritional yeast, flax seed meal, garlic salt, italian seasoning etc.

Ingredients
Kale - 1 bunch
Olive oil - 1 tablespoon
Apple cider vinegar - 1 teaspoon
Salt to taste

Directions
Wash the kale and dry them well with paper towels. The leaves should be dried completely. If wet, the kale would just be steamed instead of turning into chips.

Tear the kale leaves into bite sized pieces leaving the thick vein or inner stalk.

In a bowl add the kale and drizzle some olive oil, vinegar and salt to taste. Using both your hands, massage the kale well, so that the seasonings blend well with the kale leaves.

Preheat oven to 350 F.
In a baking tray, line with parchment paper or spray with some non-stick cooking spray and line the kale leaves in a single layer. Do not over crowd the pan as it might result in steamed kale and the chips might not turn crispy.

Bakein the oven for about 10 - 15 minutes depending on the oven. Keep checking after 10 minutes to see if the chips have become crunchy and crispy. Mine took around 12 minutes to turn crispy.

Enjoy! Store in an airtight container.

This is my entry for the Blogging Marathon with the theme Picnic Food. This would be a great healthy snack to munch on during picnics. Check out the Blogging Marathon page for the other Blogging Marathoners doing BM#6
Also sending this to Quick and Easy Recipe Mela.

Jun 24, 2011

10 Minute Banana Bread

I bake banana breads often, atleast once a month. I make sure we have a few ripe bananas left just to make this banana bread. i have experimented different banana bread recipes, but this one has been a recent favorite and a regular at my kitchen these days. It is so simple and takes about 10 minutes from the start till it gets into the oven.

Picnics are all about food and snacking. A fresh loaf of this banana bread makes a great picnic snack. it can be stored easily and sliced just before enjoying. Also makes a great quick and filling breakfast/snack with some coffee or tea. This is my second post for the blogging marathon!

Ingredients (Yields 1 full sized loaf or 2 small loaves)
Recipe Source: www.thefreshloaf.com


Bowl 1
Butter - 1/2 stick or 5 tablespoons
Eggs - 2
Ripe bananas - 2 or 3
Sugar - 2/3 cups

Bowl 2
Maida/All purpose flour - 11/3 cup
Salt - 3/4 teaspoon
Baking soda - 1/2 teaspoon
Baking powder - 1/4 teaspoon
Cinnamon - 1/2 teaspoon (optional)

Walnuts - 1/2 cup (optional)

Directions
Preheat oven to 350F.

In a bowl combine all ingredients listed under 'Bowl 1' and using a potato masher, or a fork or a spoon mash the bananas well. The banana should be mashed well, but a few chunks here and there should be fine.

In another bowl, combine all the dry ingredients listed under 'Bowl 2.'

Then, combine the wet and dry ingredients together and stir in the chopped walnuts.

Pour the prepared batter into a greased loaf pan and bake until a toothpick inserted comes out clean.

It take 40 minutes for small sized loaf pans and 50 minutes for large loaf pans approximately, depending on ovens.

Remove from the oven and allow the loaves to cool for about 10 minutes before removing it from the pan and slicing the bread.

Serve warm or cold. This bread also freezes well when wrapped in foil and stored in a ziploc bag.

Jun 23, 2011

Falafel-Pita Sandwich

Summer is ideal for picnics! Beaches, parks, riverbanks, trails, campsites are ideal for picnics. Picnics would never be complete without food and snacking! I have chosen the theme - Picnic Food for my blogging marathon this week. Yes, I will be continuously be posting recipes everyday for a week all revolving around the theme Picnic Food!


Food taken for picnics are dishes that taste great even when served cold, spill-proof and great eaten without the use of much cutlery. This falafel-pita sandwich is great for such situations. they can be made ahead and wrapped in plastic or foils and makes great picnic food. The falafels can also be prepared individually and then sandwiches can be assembled with the pita bread and the sauce just before eating.

Here is a simple and easy recipe for making great falafel-pita sandwiches. I have used hummus and greek yogurt as the sauce in this sandwich. Any kind of sauce can be used. I bought most ingredients from the grocery store except for the falafels which I made at home.

I used the kuzhipaniyaram pan to make the falafels more healthy with less oil. Falafels are traditionally deep fried. I have also tried baking the falafels. But we loved this version better.

Ingredients (makes 4 sandwiches)
For the falafel
Dried garbanzo beans - 1 cup/16 oz. can of chickpeas
Onion - 1 medium sized
Garlic cloves - 2
Fresh parsley/coriander leaves - 2 tablespoons chopped
Coriander powder - 1 teaspoon
Cumin powder - 1 teaspoon
Chilli powder - 1/2 teaspoon
Salt to taste

For the sandwich
Falafels - 8
Pita bread - 2
Cherry tomatoes - 12 (or) Regular tomatoes - 2
Onion - 1/2 cup chopped (optional)
Cucumber - 1
Greek yogurt - 4 tablespoons
Hummus - 4 tablespoons

Directions
To make the falafels
Soak the garbanzo beans overnight or atleast for 5 to 6 hours. Drain the chickpeas and pressure cook for about 10 minutes. If using canned garbanzo beans, you can skip the above step.
In a blender add the cooked and drained chickpeas along with all the ingredients listed under falafel and grind to a coarse mixture.
If using the kuzhipaniyaram pan, drizzle a little oil in each hole and place a lemon sized ball of the falafel mixture. Slightly press with the back of a spatula.


Cook on low heat for about two minutes on each side. Do not cook on high heat, because the outsides might brown too quickly and the inside might remain uncooked. Remove the falafels once cooked and allow it to cool. You can make these falafels ahead and refrigerate or freeze leftovers for future use. The falafels stay good in the freezer atleast for a month.


Alternatively, you can also make the falafels by deep-frying or baking them.

To assemble the sandwich
Take a pita bread and slice it into two equal pieces. You can toast the pita on a pan for a minute. this step is optional.


Open the pita pocket carefully, and smear one tablespoon each of the greek yogurt and hummus. Place two falafels in each sandwich. Top with your favorite toppings - cherry tomatoes, sliced onions, sliced cucumbers, coriander, parsley etc. You can also use tzatziki or tahini sauce as toppings.

Enjoy your falafel-pita sandwich!

Mar 10, 2011

Pesto Salad

This my final salad for this blogging marathon. I used store bought basil pesto for this salad. But it can be made in a snap at your kitchen. Check out my spinach-basil pesto recipe! I made this salad with olives and cherry tomatoes. It turned out to be very similar to my whole-wheat pasta salad except for the pesto dressing. You could make a whole batch of pesto and store it for weeks and make all kind of favorite pastas and pizzas with it. This was my quickie lunch this afternoon..

Ingredients
Whole grain pasta - 1 cup
Olives - 5
Cherry tomatoes
Basil pesto - 1 tablespoon
Lemon juice - 1 teaspoon
Salt and black pepper to taste
Fresh parmesan cheese

Directions
Cook the pasta according to the manufacturer's instructions. Since I do not like my salads to be warm, I rinse the pasta in cold water after cooking. Drain the water from the cooked pasta.

Combine the pesto, salt, pepper and lemon juice to the cooked pasta and mix well.

Add the cherry tomatoes and sliced olives to the pasta.

Plate the salad and add some freshly grated parmesan cheese on top..

Enjoy!

Check out the bloggers doing the Blogging Marathon, along with me..
30 Minutes Meals:Priya Mahadavan, Pavani,
Seven Days of Salad: lla
For Ongoing 7 Events: Priya Suresh, Suma Gandlur,Harini,
Kids Friendly: Vatsala, Jay,Kamalika
Seven Days of Rice: Veena,PriyaVaasu,Padma Rekha

Mar 9, 2011

Tropical Fruit Salad / Fruit Chaat

It is seven days of salad here at my place! This is the fifth salad of the week! After looking at a lot of salads ranging from veggies, to pastas, to wholegrains, I wanted to make a fruit salad for today! I chanced upon this fruit salad and I liked the Indian touch to the salad.

I made this after lunch and it was a guilt-free treat! I like the addition of fresh mint which gives a whole new flavor to the fresh fruits. The fruit chaat and the kala namak render their all-indian touch! I made this with fruts available in my pantry and the fruits can be varied according to the availability by season.

Ingredients (for 1 serving)
Apple - 1/2
Banana - 1/2
Oranges - 1/2 ( I used one of these cuties)
Blueberries
Cranberries
Fresh lemon juice - 1/2 teaspoon (optional)
Kala namak/black salt/pink salt to taste
Fruit chaat masala - 1 pinch

Directions
Chop the fruits into bite sized pieces. Drizzle the lemon juice and mix well.
Sprinkle the kala namak and chaat powder as per your taste and garnish with fresh mint leaves.
Serve chilled!

Check out the bloggers doing the Blogging Marathon, along with me..
30 Minutes Meals:Priya Mahadavan, Pavani,
Seven Days of Salad: lla
For Ongoing 7 Events: Priya Suresh, Suma Gandlur,Harini,
Kids Friendly: Vatsala, Jay,Kamalika
Seven Days of Rice: Veena,PriyaVaasu,Padma Rekha

Sending this to Spring Giveaway event
 

Mar 8, 2011

Napa Cabbage Salad with Dijon Mustard dressing

This is one of the delicious salads I discovered thanks to the blogging marathon! I have chosen salads as the theme for the blogging marathon and when I was looking for new salad recipes, I came across many cabbage salad recipes. I adapted several recipes and this salad has been my favorite to date.

I customized the recipe using the ingredients in hand and I believe it would taste more Asian if sesame oil were used instead of the olive oil. I like the color combination of the purple and napa cabbage. The napa cabbage could easily be substituted with green cabbage. The dressing is kinda sweet due to the addition of agave nectar and it makes the strong cabbage flavor subtle.

Ingredients
Napa/Green Cabbage
Purple Cabbage
Cilantro - 2 tablespons chopped
Fresh ginger - 1/2 tablespoon grated
Dry-roasted peanuts - 2 spoons

For the dressing (Makes 1 serving)
Sesame oil/Olive oil - 1 tablespoons
Rice vine vinegar - 1/2 teaspoon
Agave nectar - 1/2 teaspoon (Add more if you like it sweet)
Dijon mustard - 1/2 teaspoon (I have used whole grain dijon mustard)

Directions
Whisk together all the ingredients for the salad dressing.

Chop the cabbage evenly and place in a bowl or salad plate. Add chopped cilantro and grated ginger. Drizzle the salad dressing on top and toss well until combined.

Garnish with chopped peanuts.

Check out the bloggers doing the Blogging Marathon, along with me..
30 Minutes Meals:Priya Mahadavan, Pavani,
Seven Days of Salad: lla
For Ongoing 7 Events: Priya Suresh, Suma Gandlur,Harini,
Kids Friendly: Vatsala, Jay,Kamalika
Seven Days of Rice: Veena,PriyaVaasu,Padma Rekha
Related Posts Plugin for WordPress, Blogger...